Objective
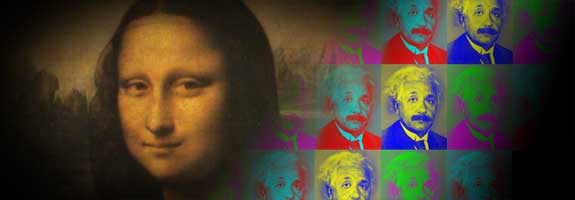
To be introduced to Photoshop's masking, blending and colorization
tools. To create the above montage by example.
Discussion
Photoshop has the ability to collage images seamlessly. When creating
montages, be sure that there is a great contrast in size to help
the viewer enter the picture. In this example, the contrasting
subjects also help communicate a concept: the merging of art
and technology. This illustration was used in a brochure for
printing inks, therefore saturated colors were chosen.
Procedure
masking mona
- download starter files
- open "mona.psd" in Photoshop
- rename "background" layer "mona"
- new layer "black"; fill with black (opt+DELETE)
- restack layers
- draw oval (w/ option key); select > transform selection,
adjust
- "mona" layer: layer > add layer mask > reveal selection
- layer mask: filter > blur > gaussian blur (40)
making alberts
- open "albert.psd"
- copy/paste image into "mona.psd" (cmd+A; cmd+C, cmd+V)
- rename layer "albert"; hide others
- window > show channels
- go to blue channel; image > adjust > invert (cmd+I);
go back to "RGB"
- window > show layers
- dupe albert (move tool, add option to copy)
- go to channels, invert red channel, go to RGB channel, return
to layers
- dupe albert again
- go to channels, invert blue channel (again), go to RGB channel,
return to layers
- combine all 3 alberts: merge down (cmd+E), repeat
- dupe again (option+move);
reposition, repeat
- combine alberts: go to top layer, merge down (cmd+E), repeat
- reveal "mona" and "background" layers
masking alberts
- layer > add layer mask > reveal all (note icon in floating
palette)
- choose default colors
- draw linear gradient (foreground to background)
- new layer "corner"
- draw linear gradient (foreground to transparent)
grading
- add your name and the exercise number on the PSD file
- layer > flatten image; image > mode > CMYK
- file > save as (format=JPEG; quality=10)
- open the JPEG in Photoshop and print a proof for grading
- file your graded proof in your Process Book for individual review
