Objective
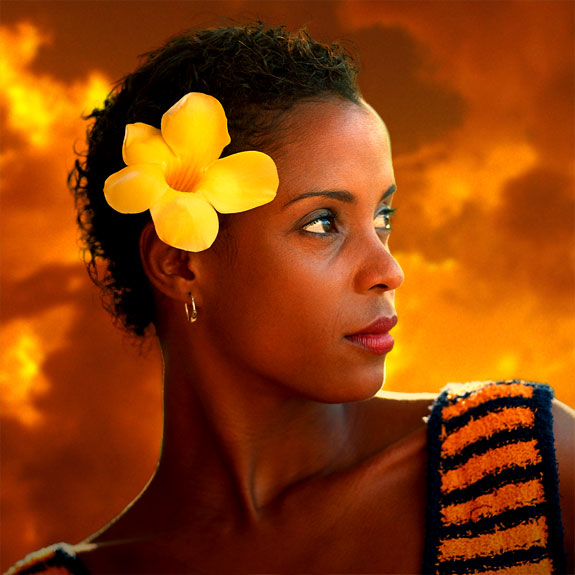
To be introduced to Photoshop's silhouetting, masking and effects
tools. To recreate the
above composite image by example (also see Photoshop WOW Book pp 628-634).
Overview
Cut out an image, composite image with another image. Adjust color, lighting, grain.
Procedure
practice cutting out the background
- download starter files
- open "girl.jpg" in Photoshop, save as "girl.psd"
- practice Adobe navigation keyboard shortcuts: space = hand;
space + cmd = zoom in; space + cmd + opt = zoom out; cmd + zero
= fit in window
- duplicate "background" layer 3x, rename "lasso, "magnetic lasso", "extract" (reveal only one layer at a time)
- CAP LOCK=precise cursor
- magnetic lasso tool: single-click
a starting point; DELETE removes anchors; single-click adds an
anchor; double-clicking will close the selection; use quickmask mode to retouch
- lasso tool: hold down OPT, single-click adds an
anchor, release OPT to close selection; DELETE removes anchors; use quickmask mode to retouch
- select > save selection
extracting the background
- go to "extract" layer, hide others (OPT-click eye)
- filter > extract
- edge highlighter tool (use smart highlighting for sharp edges): highlight the edge of the image (hold OPT to erase highlighting)
- fill tool: fill the center of the image (this protects the image)
- smooth value=100
- choose preview, choose green matte
- use the cleanup tool to remove extra background (hold OPT to add image) (choose [ or ] to change brush size) (type a number to change pressure)
- load selection (cmd+click thumbnail)
- add layer mask (flyout menu)
- retouch mask (if needed)
compositing the images
- open "bg.jpg"
- move tool: drag extracted images onto "bg.jpg"
- save as "composite.psd"
- image > adjust > match color (source="bg.jpg", fade=75)
- filter > render > lighting effects
- load selection (cmd+click thumbnail)
- add "levels" adjustment layer (flyout menu): darken
- lighten right side of background: add adjustment layer, add layer mask, paint gradient on layer mask (round)
add noise
- new layer "noise", edit > fill: 50% gray
- move to above "background" layer
- layer mode=overlay (gray
becomes invisible)
- filter > noise > add noise
grading
- print a color proof with your name on it for grading
- file your graded proof in your 3-ring binder for individual review
