Objective
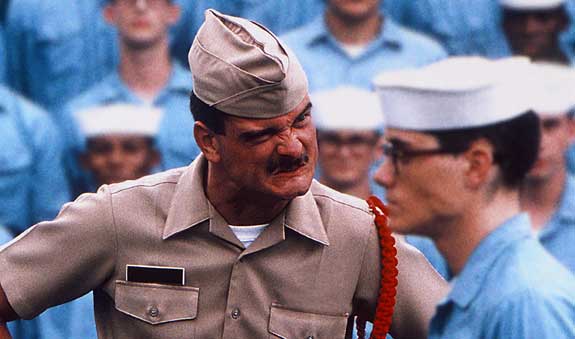
To be introduced to Photoshop's silhouetting, masking and blurring
tools. To recreate the
above retouched image by example.
Discussion
Depth is an illusion in 2D space. One way to create depth is to
see the way a camera sees the world. Photographers like to use
a "shallow" depth of field to exaggerate this effect. In addition
to fooling the eye into "seeing" depth, we have the additional
benefit of selective focus, or creating a focal point. Focal
points are important in art because they allow viewers an easy
entry point into the image.
Procedure
prepping the file
- download starter file, open in Photoshop
- practice Adobe navigation keyboard shortcuts: space = hand;
space + cmd = zoom in; space + cmd + opt = zoom out; cmd + zero
= fit in window
- double-click "Background" layer; rename "original"
(this is now a "normal" layer)
- dupe layer 3x, rename: "foreground", "midground",
"background" (opt-drag layer to "new layer"
icon)
masking the background layer
- go to "background" layer, hide others
- magnetic lasso tool: silhouette sergeant + soldier (single-click
a starting point; DELETE removes anchors; single-click adds an
anchor; double-clicking will close the selection)
- quickmask mode: retouch by painting black or white (double-click tool for options: mask color, reverse mask)
- select > save selection (new channel "sergeant + soldier"),
deselect
- select > load selection "sergeant + soldier" (or
cmd+click on thumbnail in channels floating palette)
- layer > layer mask > hide selection (this makes a hole in the picture)
masking the midground layer
- go to "midground" layer, hide others
- select > load selection "sergeant + soldier" (or
cmd+click on mask thumbnail on "background" layer)
- layer > layer mask > reveal selection (this
removes the background)
masking the foreground layer
- go to "foreground" layer, hide others
- select > load selection "sergeant + soldier" (or
cmd+click on mask thumbnail on "background" layer)
- quickmask mode: remove sergeant from selection (only the soldier
is now selected)
- standard mode: select > modify > expand: 5 (selection
is now wider than soldier)
- layer > layer mask > reveal selection (this leaves just the soldier)
blurring
- reveal all layers
- go to "foreground" layer
- filter > convert for smart filters
- filter > blur > gaussian blur: 3
- filter > noise > add noise: gaussian, amount = 6
- filter > noise > median: 1
- note stacking order of smart filters
- repeat with " background" layer (gaussian blur = 5)
grading
- add your name and the exercise number on the PSD file
- make a JPEG of the file for printing (file > save for web)
- open the JPEG in Photoshop and print a proof for grading
- file your graded proof in your Process Book for individual review
