Objective
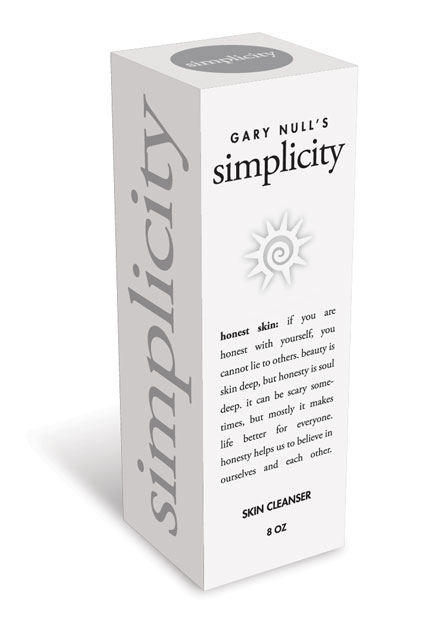
To learn Illustrator and Photoshop production techniques by recreating the package "comp" below.

Discussion
Package designers often make use of pre-designed templates from manufacturers in order to save money. In this exercise, we will use an existing "die" template as a starting point for our design. Then we will take components from the template to create a 3D mockup for client presentation.
Tip: Illustrator's 3D functions require the use of "symbols." In order to make symbols out of pixel elements, one needs to embed the image first
(window > links: flyout menu).
Procedure
Creating the art in Illustrator
- download starter files
- open "2x6x2.ai" in Illustrator, save as "simplicity.ai"
- practice Adobe navigation shortcuts (space=hand, space+cmd=zoom in, space+cmd+opt= zoom out; cmd zero=fit in window)
- new layer "art"
- file > place "sun.psd"; embed (window > links: flyout menu)
- copy and paste UPC code from "upc.ai", position on bottom panel
- copy and paste text from "simplicity.rtf" into Illustrator
- make all text Adobe Garamond 10/16, centered
- make back panel 7/11
- style other text (make select text bold, make heads Futura Heavy, scale/track, center or justify as needed)
- make circle and side text PMS 877 silver (window > swatch libraries > color books > Pantone metalic coated)
- print 11x17 laser with your name & exercise number on it
- save, save as "simplicity-3d.ai"
Preparing symbol art for 3D rendering in Illustrator
- new layer "white", restack below "art" layer
- draw white rectangles: 2x2in, 2x6in (rectangle tool: opt-click)
- position/duplicate rectangles below top, front, side panels
- window > symbols: drag each panel into "symbols" panel, rename
- delete "layer 1", delete unneeded art
- save, save as "simplicty-3d-rendered.ai"
Rendering a 3D object in Illustrator
- draw rectangle 2x6in: fill=white, stroke=none
- effects > 3D > extrude & bevel:
• depth=2in
• perspective=??
• adjust axis/rotation
(tip: use wireframe shading to preview, use diffuse shading for final)
- map art: apply symbol to appropriate surface, rotate/scale art as needed
- click OK to render 3D object (tip: edit live effects in window > appearance)
- save, save as "simplicty-3d-expanded.ai"
Preparing the art for Photoshop
- art board tool: change size to letter, portrait
- object > expand appearance
- window > layers: view layer components: ungroup (2x)
- new layers: "front", "side", "top"
- move art into each layer
- new layer "bg": draw 8.5x11in white box, re-stack to bottom
- file > export "simplicity-3d.psd" (CMYK, 300PPI, layers=yes)
- save
Adjusting the lighting in Photoshop
- open "simplicity 3d.psd" in Photoshop
- merge each layer group (flyout menu)
- select "front" layer: add adjustment layer (levels)
- make "front" art darker
- clip adjustment layer to just one layer below (see tutorial)
- repeat: use a different gray for each panel
- new layer "shadow", restack above "bg" layer
- pen tool: draw box for shadow
- window > paths: fill path with black (flyout menu)
- filter > blur > gaussian blur
- window > layers: opacity=???
- add layer mask to "shadow" layer
- draw gradient mask perpendicular to bottom of front panel
- save, save as "simplicty-3d-shadow.psd"
grading
- add your name and the exercise number to the PSD file
- layer > flatten image
- file > save as "simplicty-3d-shadow.jpg" (format=JPEG; quality=10)
- open the JPEG in Photoshop and print a proof
- submit both proofs for grading
- file your graded proofs in your Process Book for individual review


