Objective
To learn to use Adobe Illustrator tools
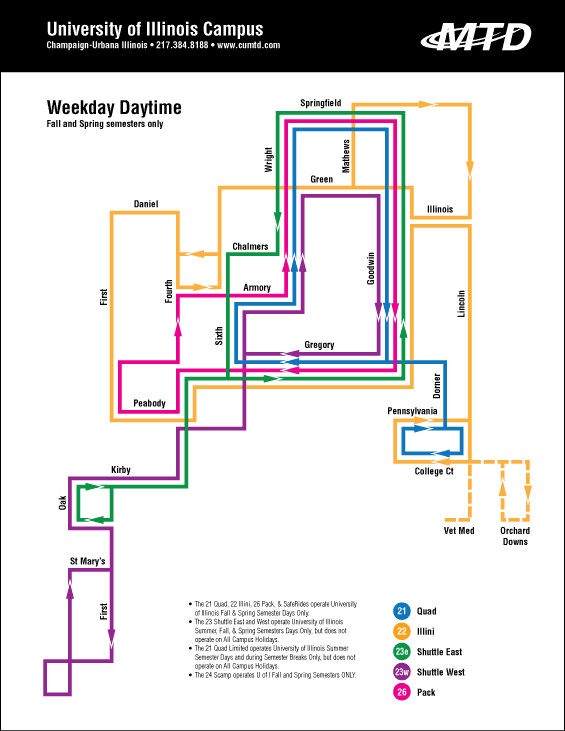
by example. To learn design principles by recreating the map above.
Discussion
Compare the before and after versions of this map. What makes the schematic version more unified? What information has been removed? How does simplicity create clearer communication?
Procedure
Prepping for the exercise
- download starter files
- launch Illustrator
- file > new (CMYK, letter, portrait); save as "mtd.ai"
- practice illustrator navigation shortcuts (space=hand, space+cmd=zoom
in, space+cmd+opt= zoom out; cmd zero=fit in window)
- expand dock
- view> show grid (cmd+"); view > snap to grid (cmd+shift+")
- file > place "mtd-campus-before.jpg" (template=yes)
- scale image to fit page (unlock layer)
- edit > preferences > guides & grid: gridline=36pt (.5in); subdivision=4; grid in back=no
- new layer "key": draw circles and assign fill colors for each bus line (21, 22, 23e, 23w, 26)
- new layer "type": label each circle (10pt Helvetica Cond Bold)
- window > swatches: select all unused (flyout menu); delete
- adjust color formulas, make swatches global
Drawing the map
- new layer "23w" (color=violet); lock other layers
- pen tool: stroke=purple, weight=4pt
- draw route based on template
- draw triangle (rotate square 45°, delete bottom anchor); fill=purple; stroke=white, weight=1pt
- repeat with other routes
- add street names on "type" layer
- dashed line: dash=12pt, gap=3pt
- save, save as "mtd2.ai"
- delete "template" layer, reposition art
Finishing the map
- new layer "box": draw black box
- add additional type from "mtd.rtf"
- copy and paste logo from "mtd-logo.ai" (fill=white)
- save, print
Grading
- add your name to the bottom of the file
- file > save for web: preset=GIF 32 no dither, image size=800px wide
- publish GIF as a link from your projects page
- submit a color laser proof with your
name on it for grading
- file graded proof in your 3-ring binder for individual review


